
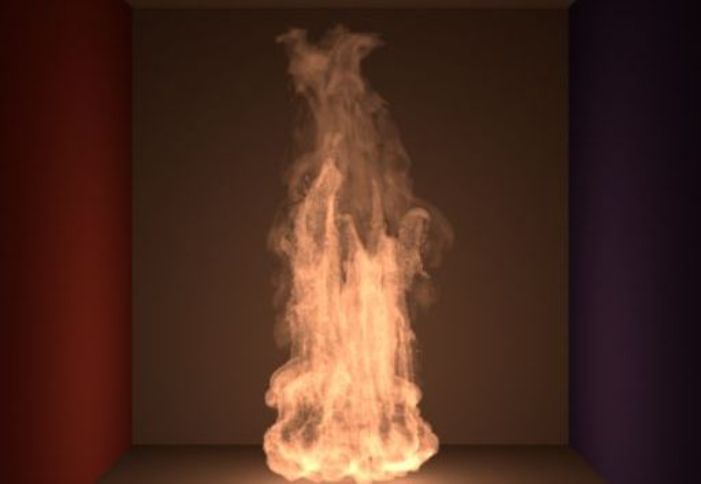
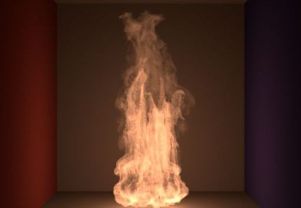
 We live in a world of conveniences. Everything comes to us via the flick of a switch or the touch of a button. One of the most popular – and necessary – of these conveniences is electricity. More specifically, lights. But what happens if the lights go out? This is when you need to know Emergency Light Sources: for the Home Prepper that work!
Electricity provides us with modern lighting, and most of us have come to take this for granted. We have become so dependent on lighting of this type that we have a mini-panic attack whenever we experience a power outage.
We break out the candles, flashlights, cigarette lighters, and any other lighting option at our disposal, resorting to the primitive emergency light sources just to keep the darkness at bay.
Given our reactions to the loss of electricity and the resulting necessity to turn to off grid lighting sources during such events, one can’t help but think back to the times when lighting did not come at the flick of a switch. What must life have been like during such times? What did our ancestors do for no-grid or grid down lighting options?
Emergency Light Sources: Primitive and DIY Lamps
 Experts have found evidence that the earliest forms of lamps were created by making depressions in rocks, placing a bit of animal fat in them, and lighting this on fire in order to provide light. Any non-flammable object, such as a rock, shell, bone or clay fragment, etc, can be used to hollow out a space to hold some type of fuel in order to create a lamp.
Today, creating these types of primitive lighting sources is a popular educational activity for children on camping trips, Boy Scout projects, and the like.
One way to make a simple but effective primitive lighting source is called the clam shell oil lamp. This type of light source can be easily made from scrapes found around the house.
To create this simple clam lamp, you need to have the following:
- Cleaned clam shell (half shell to hold the fat waste or cooking oil & other half to use as a cover when not in use)
- Fat waste (ex. bacon grease of fat leftovers), Cooking oil (ex. Olive oil), Lard or Beeswax
- A thin wick made from cotton material, or twisted paper towel (no synthetic materials please!)
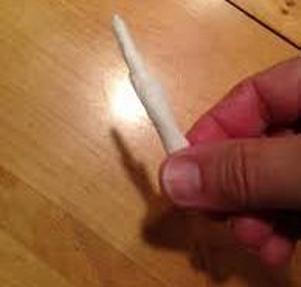 Begin by shaping your cotton or paper material into a wick by rolling back and forth into into a strand. Next, saturate or rub your wick in the oil, wax or grease. Take the prepared wick and coil it up into the half clam shell. Using a match or lighter, begin to burn the wick. Depending on the amount of soaked wick, your clam lamp will provide a source of light that can last over 40 minutes or longer.
You can keep the lamp continuously lit by either carefully pouring more fuel (melted grease or liquid oil) or replace the waxed wick. When extinguished and traveling you can have harden fat waste and prepared wick in half the shell while using the other have as a cover. Keep both half clam shells closed by using rubber bands to keep them from coming apart.
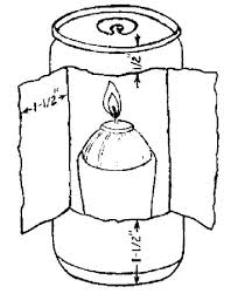 If you don not have clams shells, you can use other containers such as soda can, tin, glass, spoon, ceramic bowl or any other reservoir that is both nonflammable nor risk of melting.
You can substitute wick material by using pieces of cloth or old rags as long as they are made of natural, preferably cotton based fabrics. Thus, producing an oil based lamp can be both easy and practical.
Emergency Light Sources: Candles
A wide variety of waxes can be used to make candles: vegetable, animal, and mineral waxes or any combination thereof, for example. Two of the most commonly known forms of animal wax are beeswax and tallow.
Tallow candles are considered to be of a lower quality than beeswax candles because they produce a sooty smoke when burned, along with an unpleasant aroma of the animal they came from. Vegetable waxes include soy and palm, and mineral wax, also known as paraffin, is a wax derived from petroleum during the refining of crude oil.
 Beeswax is produced by the worker bees (genus: apis) of the hive. Honeybees (genus: apis mellifera) produce beeswax in order to construct the honeycomb in their hives. Once the honey is harvested from the hive, the remaining honeycomb can be collected and retained to produce beeswax candles.
The raw beeswax extracted fresh from the hive bears very little resemblance to the clean, purified beeswax beads found in craft stores. In order to make candles, the beeswax must be stripped of any remaining honey and debris via a process known as clarifying.
Once clarified, if the wax still contains unwanted particles and debris, simply heat the wax again using a double-boiler, and strain it through a finely-woven cloth or coffee filter. It is important to keep the wax warm during the second clarification so that it will run properly through the cloth or filter.
Since beeswax burns at higher temperatures than paraffin wax, it requires a special type of wick. Square-braided cotton wicks which are approximately double the thickness of those used for the same amount/size of a paraffin wax candle are preferred. Like the oil lamps previously described, the diameter of the wick will be determined by the size and type of candle being made.
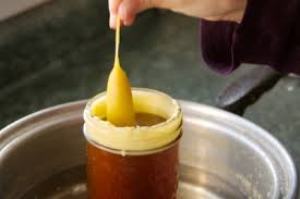
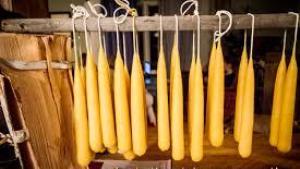 Hand-dipped taper candles are made by simply tying a length of wick to a stick and dipping the wicks repeatedly into warm, melted beeswax until the candle reaches the desired thickness. Patience is required when using this method as each layer must be allowed to cool and solidify a bit before dipping to create the next layer.
It is also important to make certain that the container used to hold the melted beeswax is deep enough to dip the entire length of the candle without the wick bending or folding up at any point throughout the dipping process.
Dip the wick(s) once, allow to cool for about 30 seconds until the wax becomes firm but not hard, then gently and slowly pull on the wick to straighten it. This will “set” the wax into the shape your taper will take. Quickly dip back into the wax (doing so too slowly will cause the wax that is already on the wick to melt). Continue to dip/wait 30 seconds/dip/wait, etc, until the taper has reached the desired thickness.
There are several primitive ways of producing light, and with just a bit of forethought, planning, and ingenuity you can prepare your emergency light sources for any situation you may find yourself in where the “modern conveniences” are unavailable. There’s always a “light” at the end of the tunnel!
Further thoughts on emergency prepping, whether “Bugging In or Bugging Out” should consider my comprehensive article as an excellent primer especially for those new to survival prepping.